

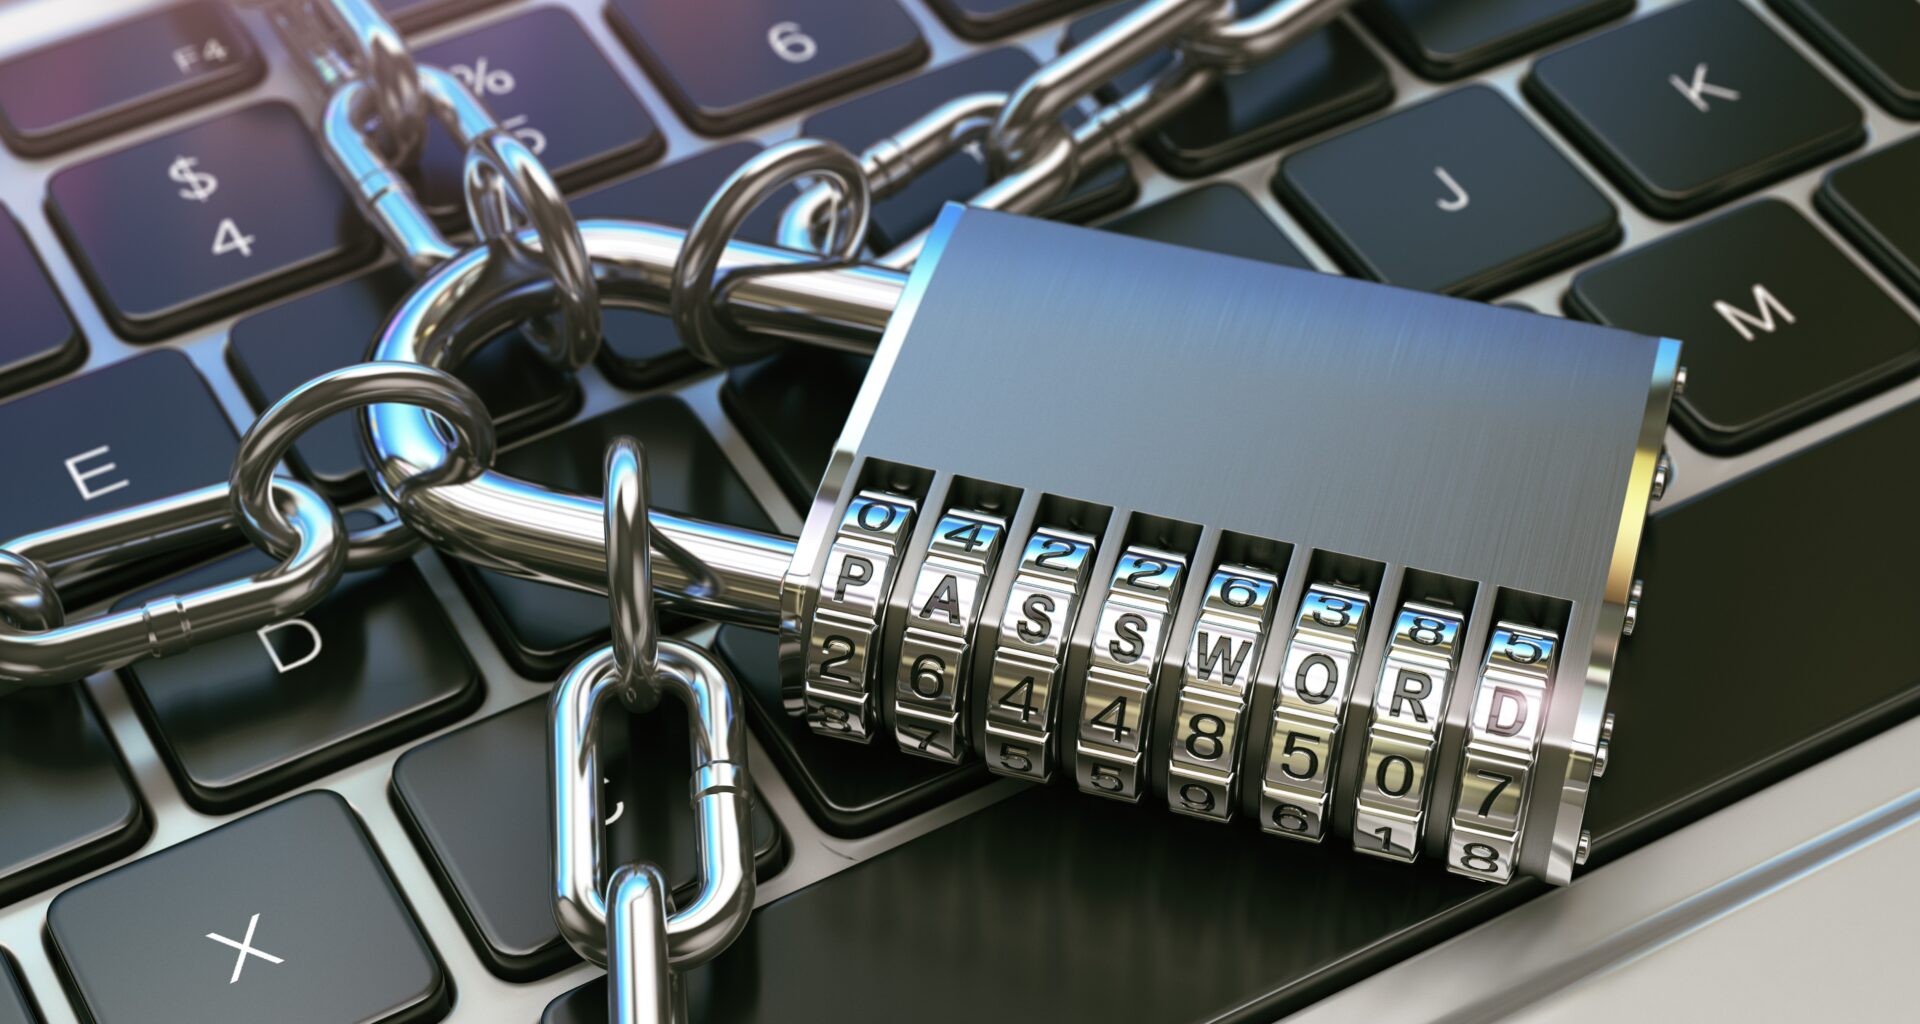
Metamask has recently updated its privacy policy, and the gist is that whenever you make a transaction on Metamask, it collects your wallet address and IP address. This essentially means that your blockchain transactions are no longer private and anonymous, as this new policy makes it easy to identify whoever has made transactions through Metamask. If you, like many others in the crypto community, value your privacy and want to circumvent this new policy update, here are some key things you can do.
- Use a different wallet provider
The obvious choice is to use a different wallet provider that will not collect your personal information each time you make a transaction. However, Metamask is the most widely accepted wallet, and if you have a ton of funds on Metamask, it would be troublesome to transfer it out.
- Use a VPN
Since the privacy policy update collects your IP address, one way you can prevent it from doing so and hence being identifiable online is through the use of a VPN. These services mask your IP address, adding a layer of security and allowing you to move through the internet anonymously.
The downside to this option is that there’s no way of really knowing how well a VPN encrypts your data, and VPN services often slow down your internet connection due to the way it works. When dealing with crypto transactions, it’s better to have a stable, fast internet connection for peace of mind. Furthermore, many VPN service providers log your internet usage details, which defeats the purpose of using it for the sake of being private and anonymous.
- Change your RPC provider
The default RPC provider on Metamask is Infura, which is owned by Consensys (who also owns Metamask). The privacy policy update specifically states that Infura will collect your IP address and ETH address whenever a transaction is made. Hence, by changing your default RPC provider, you will be able to protect your privacy without compromising the wallet you use or your internet connection speed and stability.
RockX provides an access node API service, which allows you to use it as your main RPC provider. The difference with RockX is that they have an “Incognito Mode” that allows you to block them from collecting personal and identifying information such as your IP address. As a leading provider of blockchain infrastructure, you can expect privacy, security, and stability when using their services.
How to Change Your RPC Provider on Metamask
Before getting started, you will need to have an account with RockX. It is simple and free to create on the Access Node Portal here. Once you have created your account, follow these simple steps to switch your RPC provider to RockX and maintain your privacy.
1. Subscribe to a plan that supports EVM
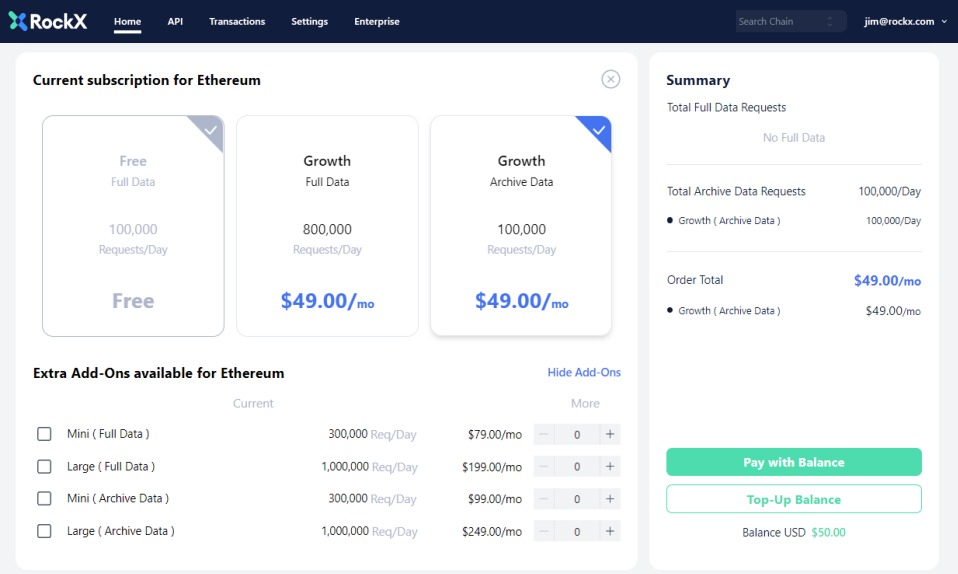
Once your account has been set up, you will get the option to subscribe to any of our plans. We offer both free and paid plans and archive or full nodes, and any of them will work for this instance. Just ensure that the plan you subscribe to is EVM compatible.
EVM-compatible chains other than Ethereum that are currently supported by RockX are:
- Avalanche
- BNB Chain
- Cronos Mainnet and Testnet
- Fantom
- HECO
- Polygon
2. Click on “Add to Wallet” button
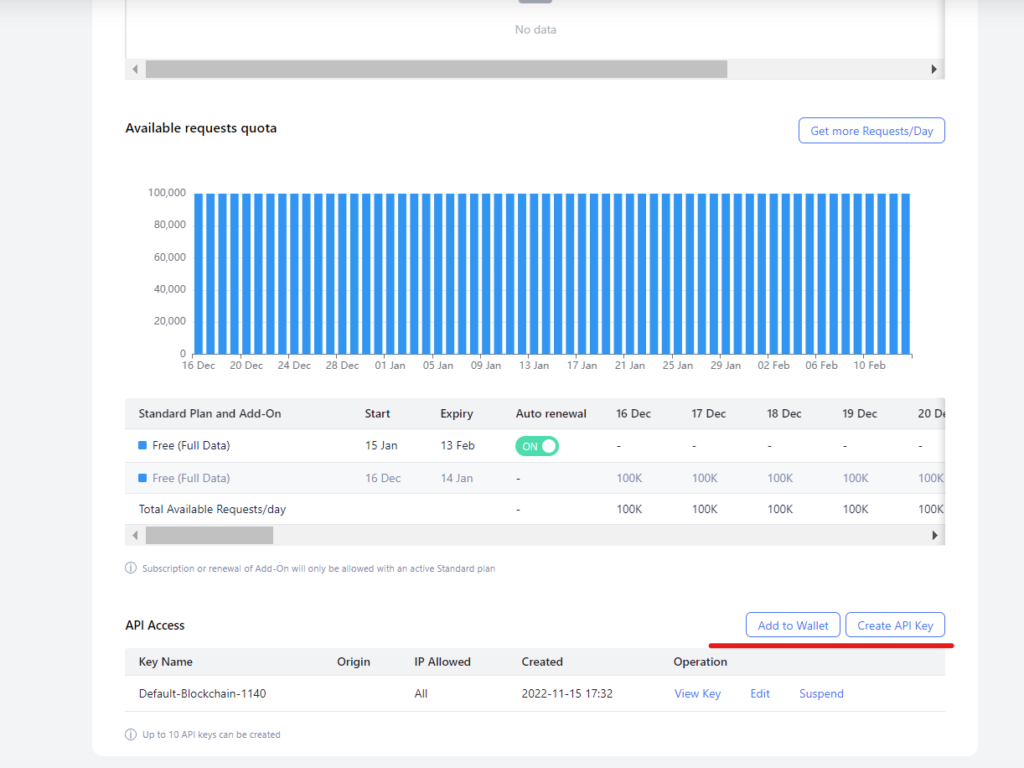
After registering for the plan, go to the API access page and click on the “Add to Wallet” button as shown in the screenshot above.
3. Add to Metamask
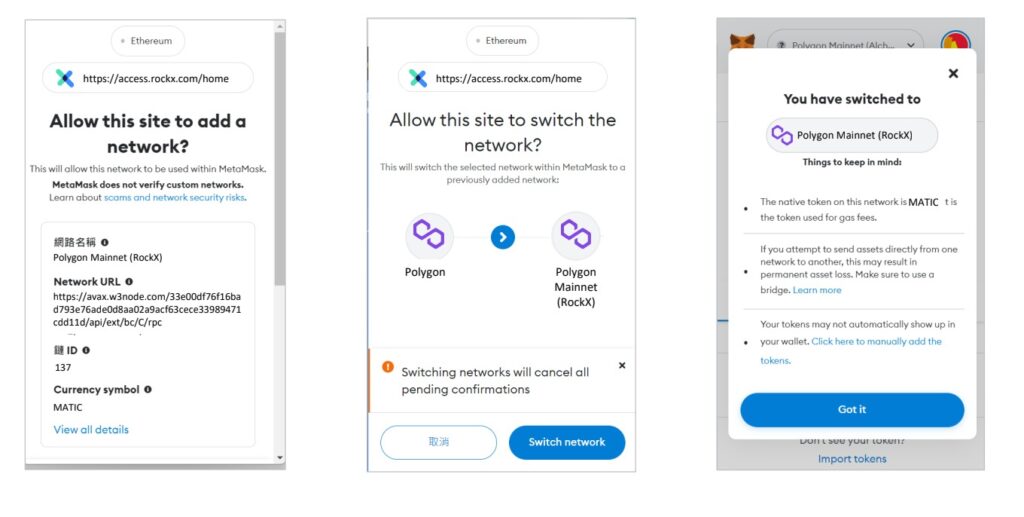
If you are connecting to the Ethereum Mainnet or Testnet, please follow the following steps. Otherwise, skip to the next paragraph.
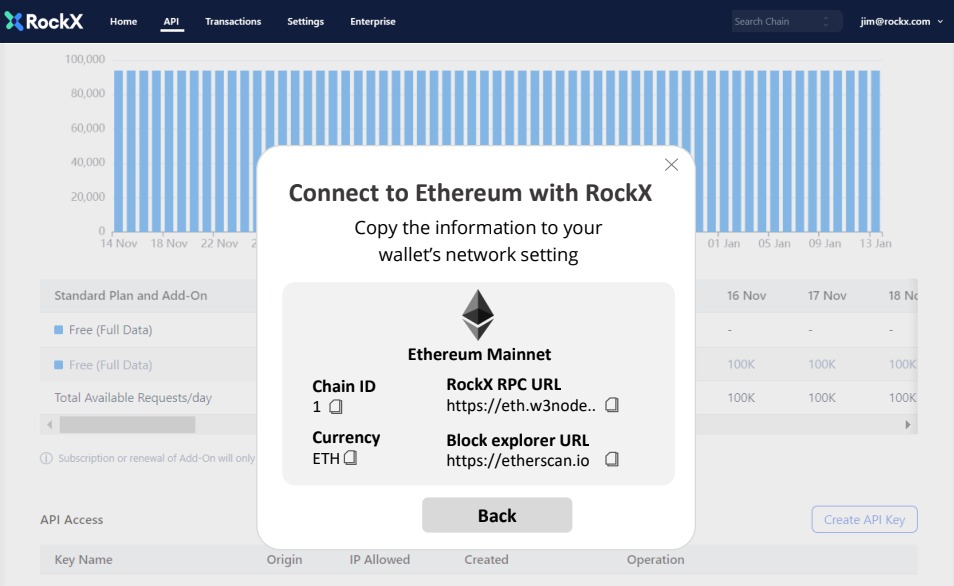
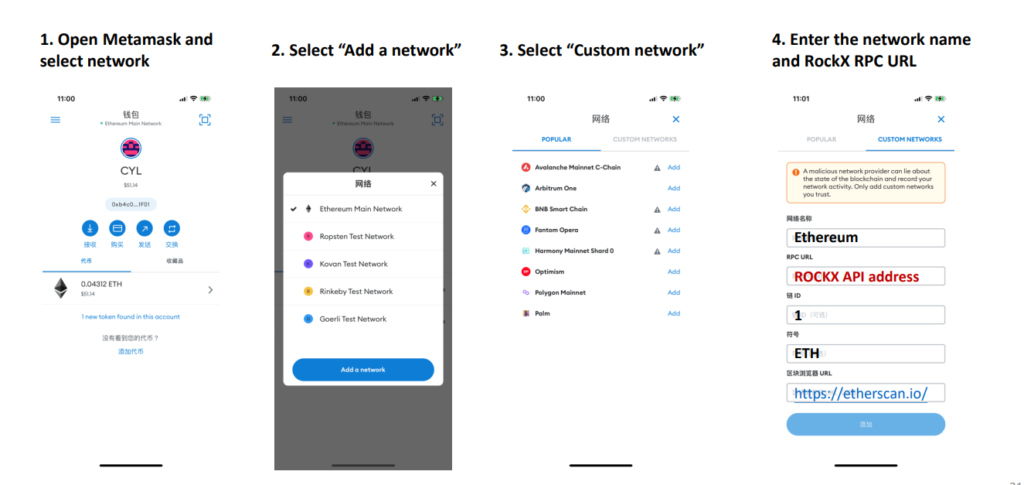
Upon clicking the “Add to Wallet” button, the above pop-up should appear. You will need to manually input the above settings to your Metamask wallet to enable RockX to be your RPC provider on Metamask. To do so, you may refer to the steps shown in the picture below.
If you are connecting to any EVM-compatible chain that is not Ethereum, please follow these steps.
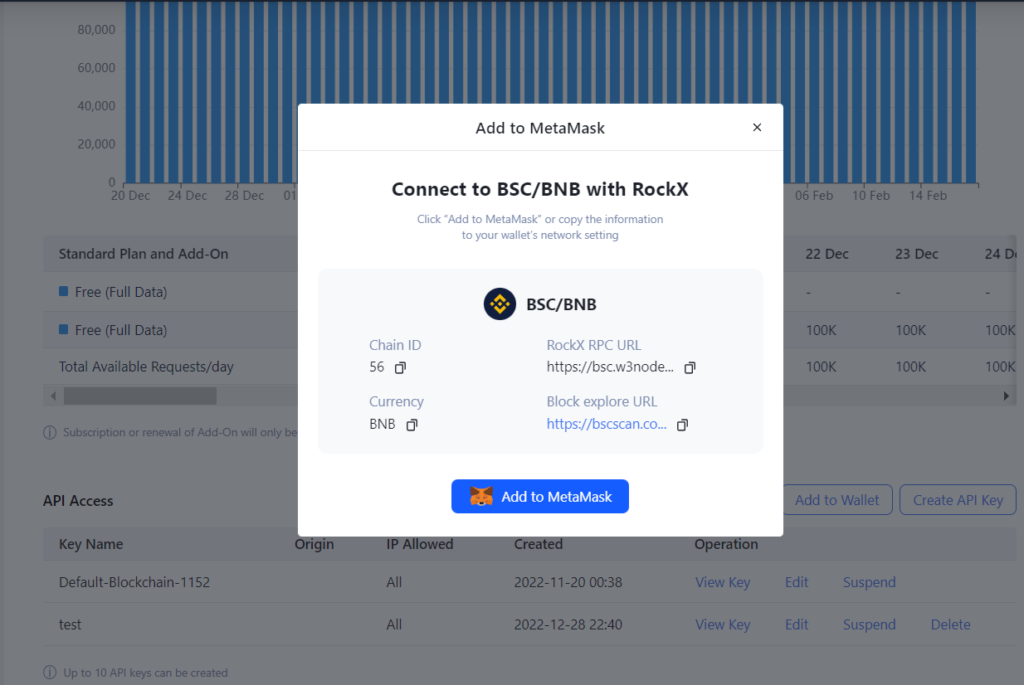
Upon clicking the “Add to Wallet” button, the above pop-up should appear. Click on the “Add to Metamask” button, and then click “Switch network” on the Metamask pop-up that appears.
4. Turn on Incognito Mode to protect your privacy
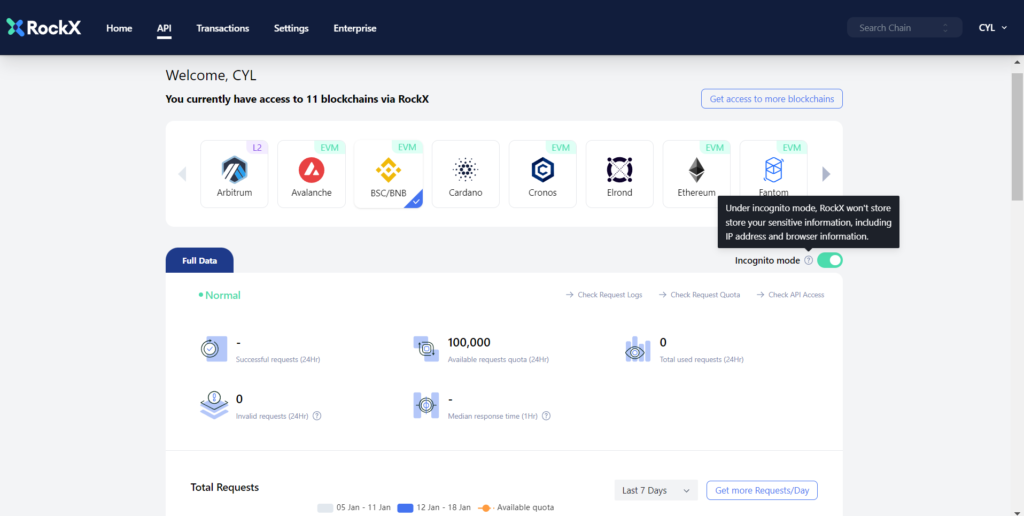
To further enhance your privacy, you may turn on Incognito mode on your RockX API dashboard. Once this is turned on, no sensitive information such as your IP address will be stored with RockX regardless of the API keys used. Do note, however, that Incognito settings only apply to the same node type. For example, if you apply Incognito mode to an ETH full node, it will not be applicable to an ETH archive node unless you turn it on for that node as well.
And that’s it! You have successfully maintained your on-chain privacy in just 4 easy steps.
More About Incognito Mode
Incognito mode does not affect the tracking of the number of requests made using the API keys, it only blocks the collection of personal information. As each subscription plan has its own limit to the number of requests, when you are near your request limit, an email will be sent to notify you.
If you are about to suspend an API key that is being used for Metamask, an alert will also be shown to remind you before you suspend it.
The Future of On-Chain Privacy
The blockchain was always created with privacy in mind. However, with increasing regulatory pressure, it seems like the goal of complete privacy and anonymity that was envisioned might not actually come to fruition. Whether or not that is a good or bad idea is yet to be determined, but at least for now, there are ways to circumvent the tight control that regulatory authorities want to implement.